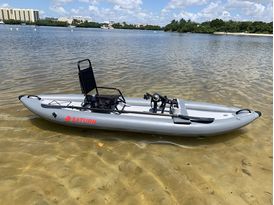
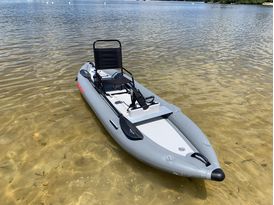
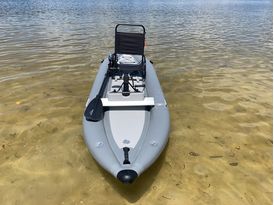
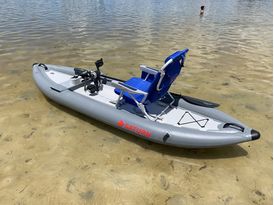
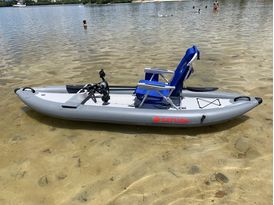
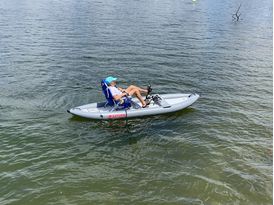
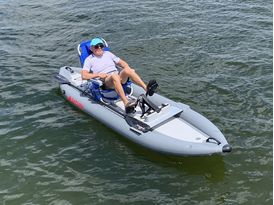
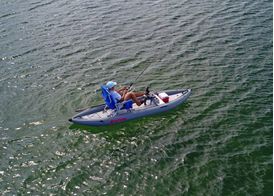
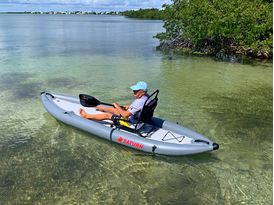
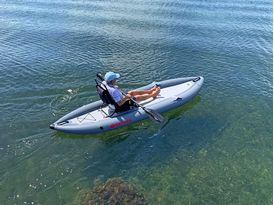
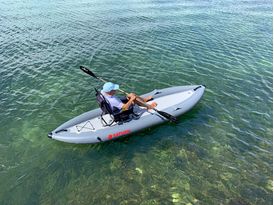
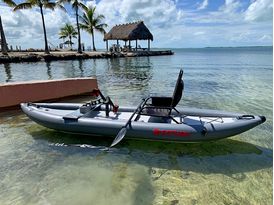
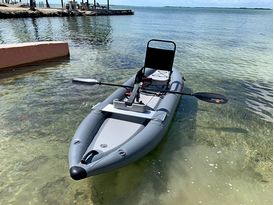
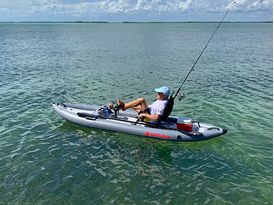
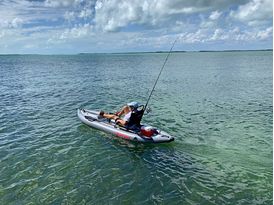
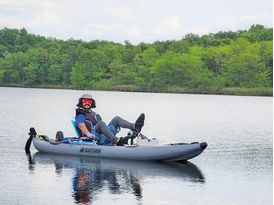
12' Inflatable Kayak with Bike Pedal Drive PK365 - V2.0.
Introducing the All-New 12' Inflatable Kayak with Bike Pedal Drive - PK365 V2.0!
We've made exciting updates to enhance your kayaking experience:
- Fins: 2 removable fins (front and rear)
- Accessory Tracks: 2 tracks for optional attachments (fishing rod holders, cup holders, fish finders, etc.)
- Pedal Drive Mount: Easy-to-install mounting board with 2 tie-down straps for secure attachment
- Pedal Drive: New, lighter, compact folding pedal drive with improved pedals
- Drainage: Self-bailing drain ports on both sides for a drier ride
- Paddle Holders: Snap-in paddle holders on the left side
- Splash Protection: Splash guards added at the bow and stern for extra water protection
- Handles: Improved rear handles repositioned to the sides for better balance and transport
- Rudder Track: Additional track at the bow for optional rudder kit with lever installation
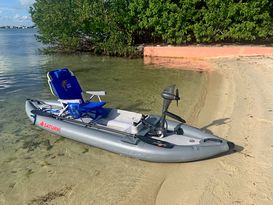
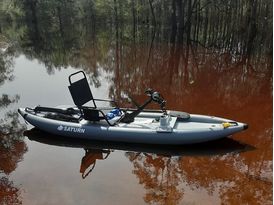
The new PKD365 V2.0 Inflatable Pedal Kayak is the perfect choice for fishing, exercise, and water adventures. This model features a human-powered pedal drive system for effortless propulsion and can easily accommodate any low or high beach chair using sturdy double D-rings with straps. Affordable chairs, including low sand chairs, are available at major retailers, and we also offer a durable aluminum chair in our Accessories section.
The PK365 comes equipped with a specially designed aluminum bench and a patent-pending rotomolded mount that securely holds the pedal drive. The high-quality aluminum pedal drive included with this kayak is a premium feature, comparable to $899 models on the market. The updated V2.0 pedal drive is lighter, folds conveniently for easy storage, and makes transportation a breeze.
An elongated cut-out in the kayak allows for quick installation of the pedal drive, while a Velcro cover closes it off when needed. For added convenience, the pedal drive can be lifted out of the way for smooth beaching. If you prefer traditional paddling, the kayak can also be used without the drive and comes with a standard kayak paddle.
Steering Options for PK365 V2.0:
- Kayak Paddle Steering – Use the included kayak paddle to adjust direction, with stabilizing fins ensuring straight tracking.
- DIY Rear Paddle Rudder – Attach a kayak or SUP paddle blade (not included) to the rear D-rings and use it as a rudder.
- Drop-In Rudder System – Install an optional kayak rudder (available on Amazon or other retailers) into the pre-drilled hole in the rear cone. Two cockpit-controlled cords adjust direction, while two bungee cords secure the rudder in a straight position. See the Attachments tab for DIY ideas. Rudder pin must be ≥3.5" to pass through fully.
- Rudder Kit with Control Lever – The new V2.0 includes compatibility for an optional rudder kit with a control lever, which installs into the rear splash guard track for easy steering. Available in our Accessories section.
The PKD365 V2.0 Inflatable Pedal Kayak combines innovative design, portability, and high performance, making it the ultimate choice for your time on the water.
SPECIFICATIONS:
- Length - 12'
- Tube diameter - 8"
- Floor thickness - 6"
- Inside width - 22"
- Max weight - 300 lbs
- Kayak weight - 33 lbs
- Pedal Drive weight - 14 lbs
- Shipping/Packing Size - 33 x 24 x 12".
- Shipping Weight - 67 lbs
- Pedal drive folded dimensions: 30 x 10 x 5"
- Pedal drive is saltwater ready. Flashing with fresh water after use is recommended.
- Recommended air pressure for tubes 25kpa and floor is 60kpa.
- Any type of beach chair, sand chair, lawn chair, etc (not included) can be mounted on top of this kayak.
- Included: carry bag, hand pump, 2 removable fins, alum bench, pedal drive and rotomolded mount for it.
- Optional rudder kit with lever available separately.
- NOT INCLUDED: beach chair, fishing rod holders.
- WARNING! Please read below for important notices.
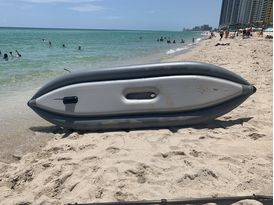
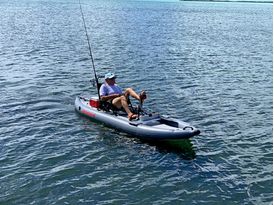
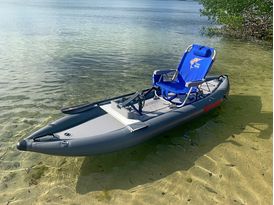
Inflatable Pedal Kayak PK365 V1.0. (shown with non folding pedal drive)
Customer's review of pedal kayak V1.0
Inflatable Pedal Kayak first prototype.
Example of optional DIY rudder system.
FAQ:
Question: Can this kayak be used for fishing, how do I add rod holders?
Answer: There is sturdy aluminum board attached across kayak hull. Fishing rod holders, fish finders, and other equipment can be bolted right to that aluminum board. Optional Scotty glue on fishing rod holders can be glued to top of tubes or floor. Milk crate with fishing rod holders can be placed on floor and secured with bungee cords or lashing tie downs. Possibilities are endless for customers with imagination and good hands. New V 2.0 now comes with rail tracks for accessories that works with any type of kayak accessories designed for tracks. Can mount for example RAILBLAZA rod holders, adapters, etc. Available on Amazon.
Quick instructions:
- If not already done so, rotomolded pedal drive mount need to be bolted to aluminum bench with 2 provided stainless steel bolts.
- 2 plastic sliding locks need to be attached on top of rotomolded mount with 2 screws each. Locks are needed to hold pedal drive rod inside mount.
- Place aluminum bench between 2 D-rings on each side of tube, in front of cut out. Use provided 2 straps to secure bench, so that it does not move. Provided basic double D-ring straps can be replaced with much stronger lashing tie downs sold on Amazon if needed. Just cut them shorter and fry cut ends with open flame.
- Position bench in such way, that mount is in center of kayak, aligned with elongated cut out in kayak floor. Pedal drive shaft must be perpendicular to the floor and centered inside cut out.
- Remove Velcro cover, and lower pedal drive into opening. Secure with Velcro strap between 2 x D-rings in front of opening, so that motor does not move upward when pedaling. If you need to raise pedal drive, simply disconnect Velcro straps and pull motor out of opening by rotating it over rod secured inside rotomolded mount. You can also close cover and place motor prop right on top of that cover.
- Do NOT try to turn pedals when prop resting on surface of kayak, as that might loosen bolt holding prop and prop can be lost while in use.
- Use straps with double D-rings to secure beach chair to kayak floor. Experiment to find best possible position. Lower chair is better.
- Generally, kayak paddle can be used to easily adjust kayak directions, with just few strokes.
Important Notes on assembly:
- Assemble kayak and pedal drive at your home first, before going for actual water run.
- Make sure all components fit properly. Please check all nuts and bolts not to be loose before first use.
- When pedal drive lowered, it's shaft should rest against cut out front section.
- Pedal drive shaft must be perpendicular to kayak floor.
- If pedal drive not perpendicular to the floor, it might be necessary to re-drill new holes on aluminum bench to adjust position of pedal drive little bit forward or backward. Because inflatable kayaks assembled manually, one by one, slight variations are possible during production. If that is the case, and shaft not under 90 degree angle to the floor, then all you need to do, is to remove bolts from motor mount, position it on top of aluminum bench in a such way that shaft of pedal drive is perpendicular to the floor, mark edge of motor mount on bench, and drill 2 new holes to secure motor mount to bench. Another option would be to remove plastic pedal drive mount, rotate it 180 degree, and then bolt it back to aluminum bench. Because distance from tube to edge of mount different that might move pedal drive shaft to correct position without need for drilling.
- Pedal drive rebuild video can be found here. Oiling and maintenance videos here.
- Spare parts available. Please contact us for spare parts.
Important Warnings:
- DO NOT USE HAMMER DURING ASSEMBLY OF PEDAL DRIVE. THAT WILL DAMAGE GEAR INSIDE PEDAL DRIVE AND WILL VOID WARRANTY.
- NOTE, THAT OUT OF 2 BOLTS SECURING PEDAL CRANKS TO DRIVE, ONE IS CLOCKWHISE BOLT AND ANOTHER IS COUNTERCLOCKWISE.
- INSPECT ALL BOLTS ARE TIGHT AND NOT LOOSE. APPLY OPTIONAL LIQUID LOCKNUT IF NEEDED.
- INSPECT BOLT HOLDING PROP IN PLACE TO MAKE SURE IT IS NOT LOOSE, TO AVOID LOOSING PROP IN A WATER. APPLY LOCKNUT LIQUID.
- APLY OPTIONAL LIQUID LOCKNUT TO BOLTS, AS AN ADDITIONAL OPTION, TO PREVENT BOLTS BEEING LOOSEN DURING OPERATION.
- WEAR PERSONAL FLOTATION DEVICE OR HAVE IT AVAILABLE.
- INFLATE MAIN FLOOR TO MAX OF 70KPA(10PSI) INFLATE SIDE TUBES TO MAX OF 25KPA(3.5PSI)
- DO NOT LOAD HEAVY WEIGHT ON A KAYAK WHEN FINS ARE ON A GROUND.
- DO NOT DRAG KAYAK OVER PAVEMENT.
- CLICK ON ATTACHMENT TAB TO DOWNLOAD PEDAL DRIVE MANUAL.
- MAKE SURE TO LUBRICATE PEDAL DRIVE FROM TIME TO TIME.
- KAYAK WARRANTY 2 YEARS, PEDAL DRIVE 1 YEAR.
Download Manuals and Instructions
Frequently Asked Questions:
Question: Can this kayak be used for fishing, how do I add rod holders?
Answer: There is sturdy aluminum board attached across kayak hull. Fishing rod holders, fish finders, and other equipment can be bolted right to that aluminum board. Optional Scotty glue on fishing rod holders can be glued to top of tubes or floor. Milk crate with fishing rod holders can be placed on floor and secured with bungee cords or lashing tie downs. Possibilities are endless for customers with imagination and good hands.
Question: Why kayaks does not have rudder in a rear?
Answer: In order to keep price affordable, we decided to opt out of kayak rudder. Kayak comes with 2 fins that offer strait tracking. Kayak paddle can be used to adjust direction as needed. Optional rudder can be easily added to this kayak if it required. Please see suggested method of installation in Attachments tab.


